Putting on the Do
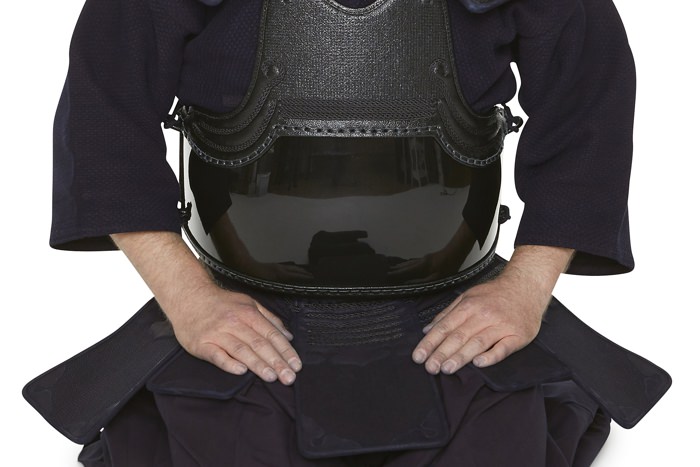
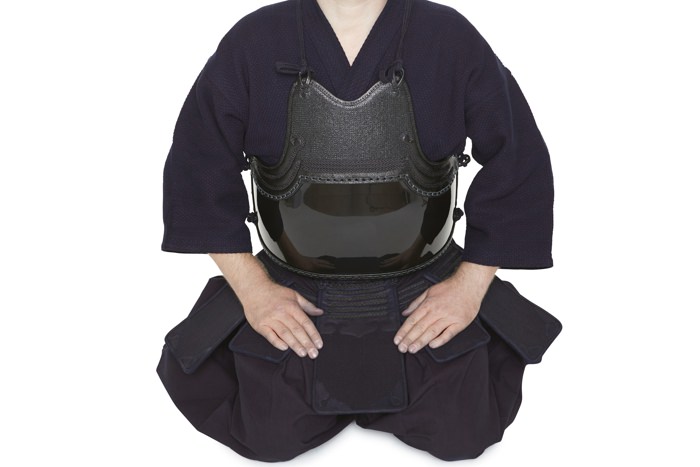
1. The next piece of armour to be put on is the Do. It is to be pressed to your chest with your hand so that the bottom edge of the Do overlaps with about half of the Tare band.
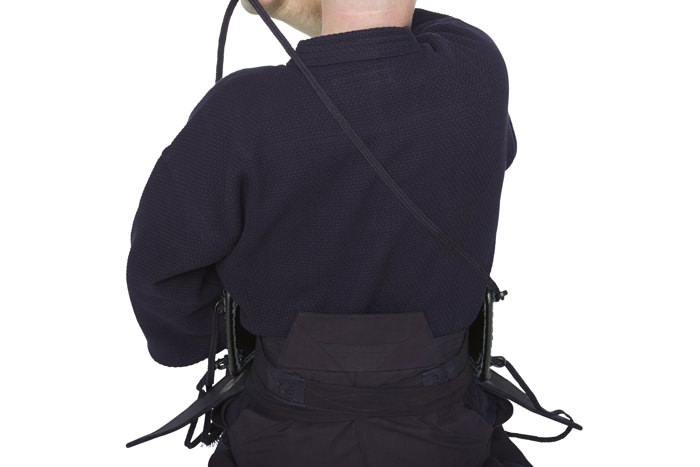
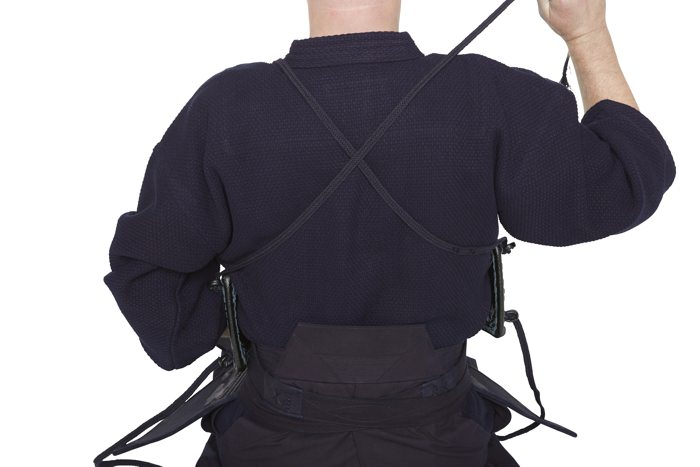
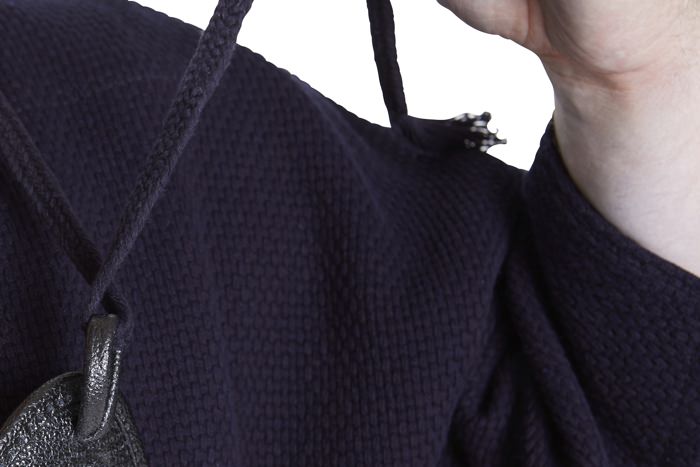
2. First, cross the upper Do Himo, guide it above the shoulder and fasten it to the opposing leather strap. Be careful not to twist the Himo.
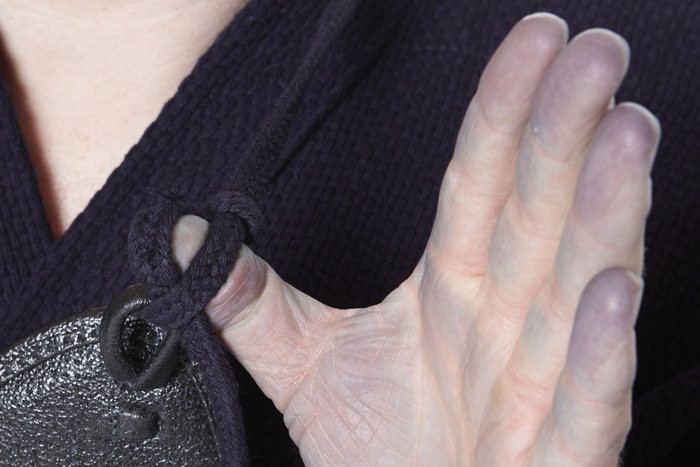
3. To fasten the leather strap, guide the band with a double loop through the leather strap as shown.
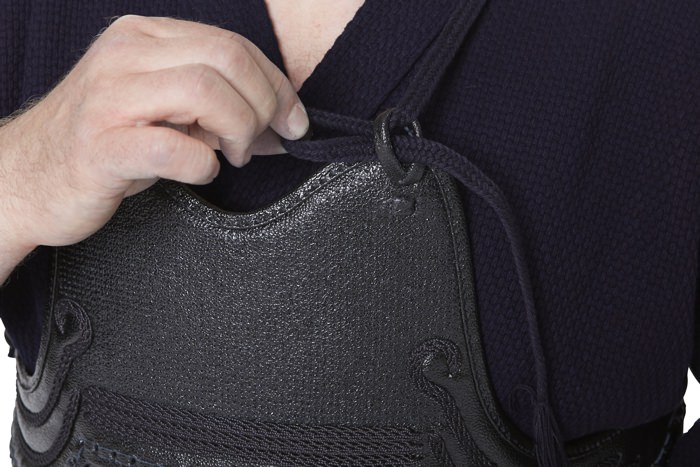
4. Also pull the loose ends of the Himo in doubled in a loop through the first loop and fasten them.
5. The loops and ends should hang at the same length. As with all the armour, be sure that it is tightly fastened!
6. Then the lower Do Himo is to be fastened with knots and bows so that the loops are point horizontally.

7. Now you are finished putting on the Tare and the Do.Tare und Do sind nun angelegt.
Video:
 This video is licensed under a Creative Commons Attribution-NonCommercial-NoDerivatives 4.0 International License. You are free to share it or integrate it into your website. More about it [here].
Tipp:
- New Himo tend to become loosened on their own! To prevent this, shortly before training you should dampen the Himo, pulling it through a wet towel. It then holds better.
- When buying a new Gi, it is advisable to buy new Do-Himo as well. This prevents light stripes from appearing on the new Gi.
To our Do-Himo [click here].
